In 24FPS, you can apply all your favorite Polarr filters to your videos to match your aesthetic taste. Begin a new editing session by selecting the video you want to edit in the "Edit" panel.
1. Apply Filter
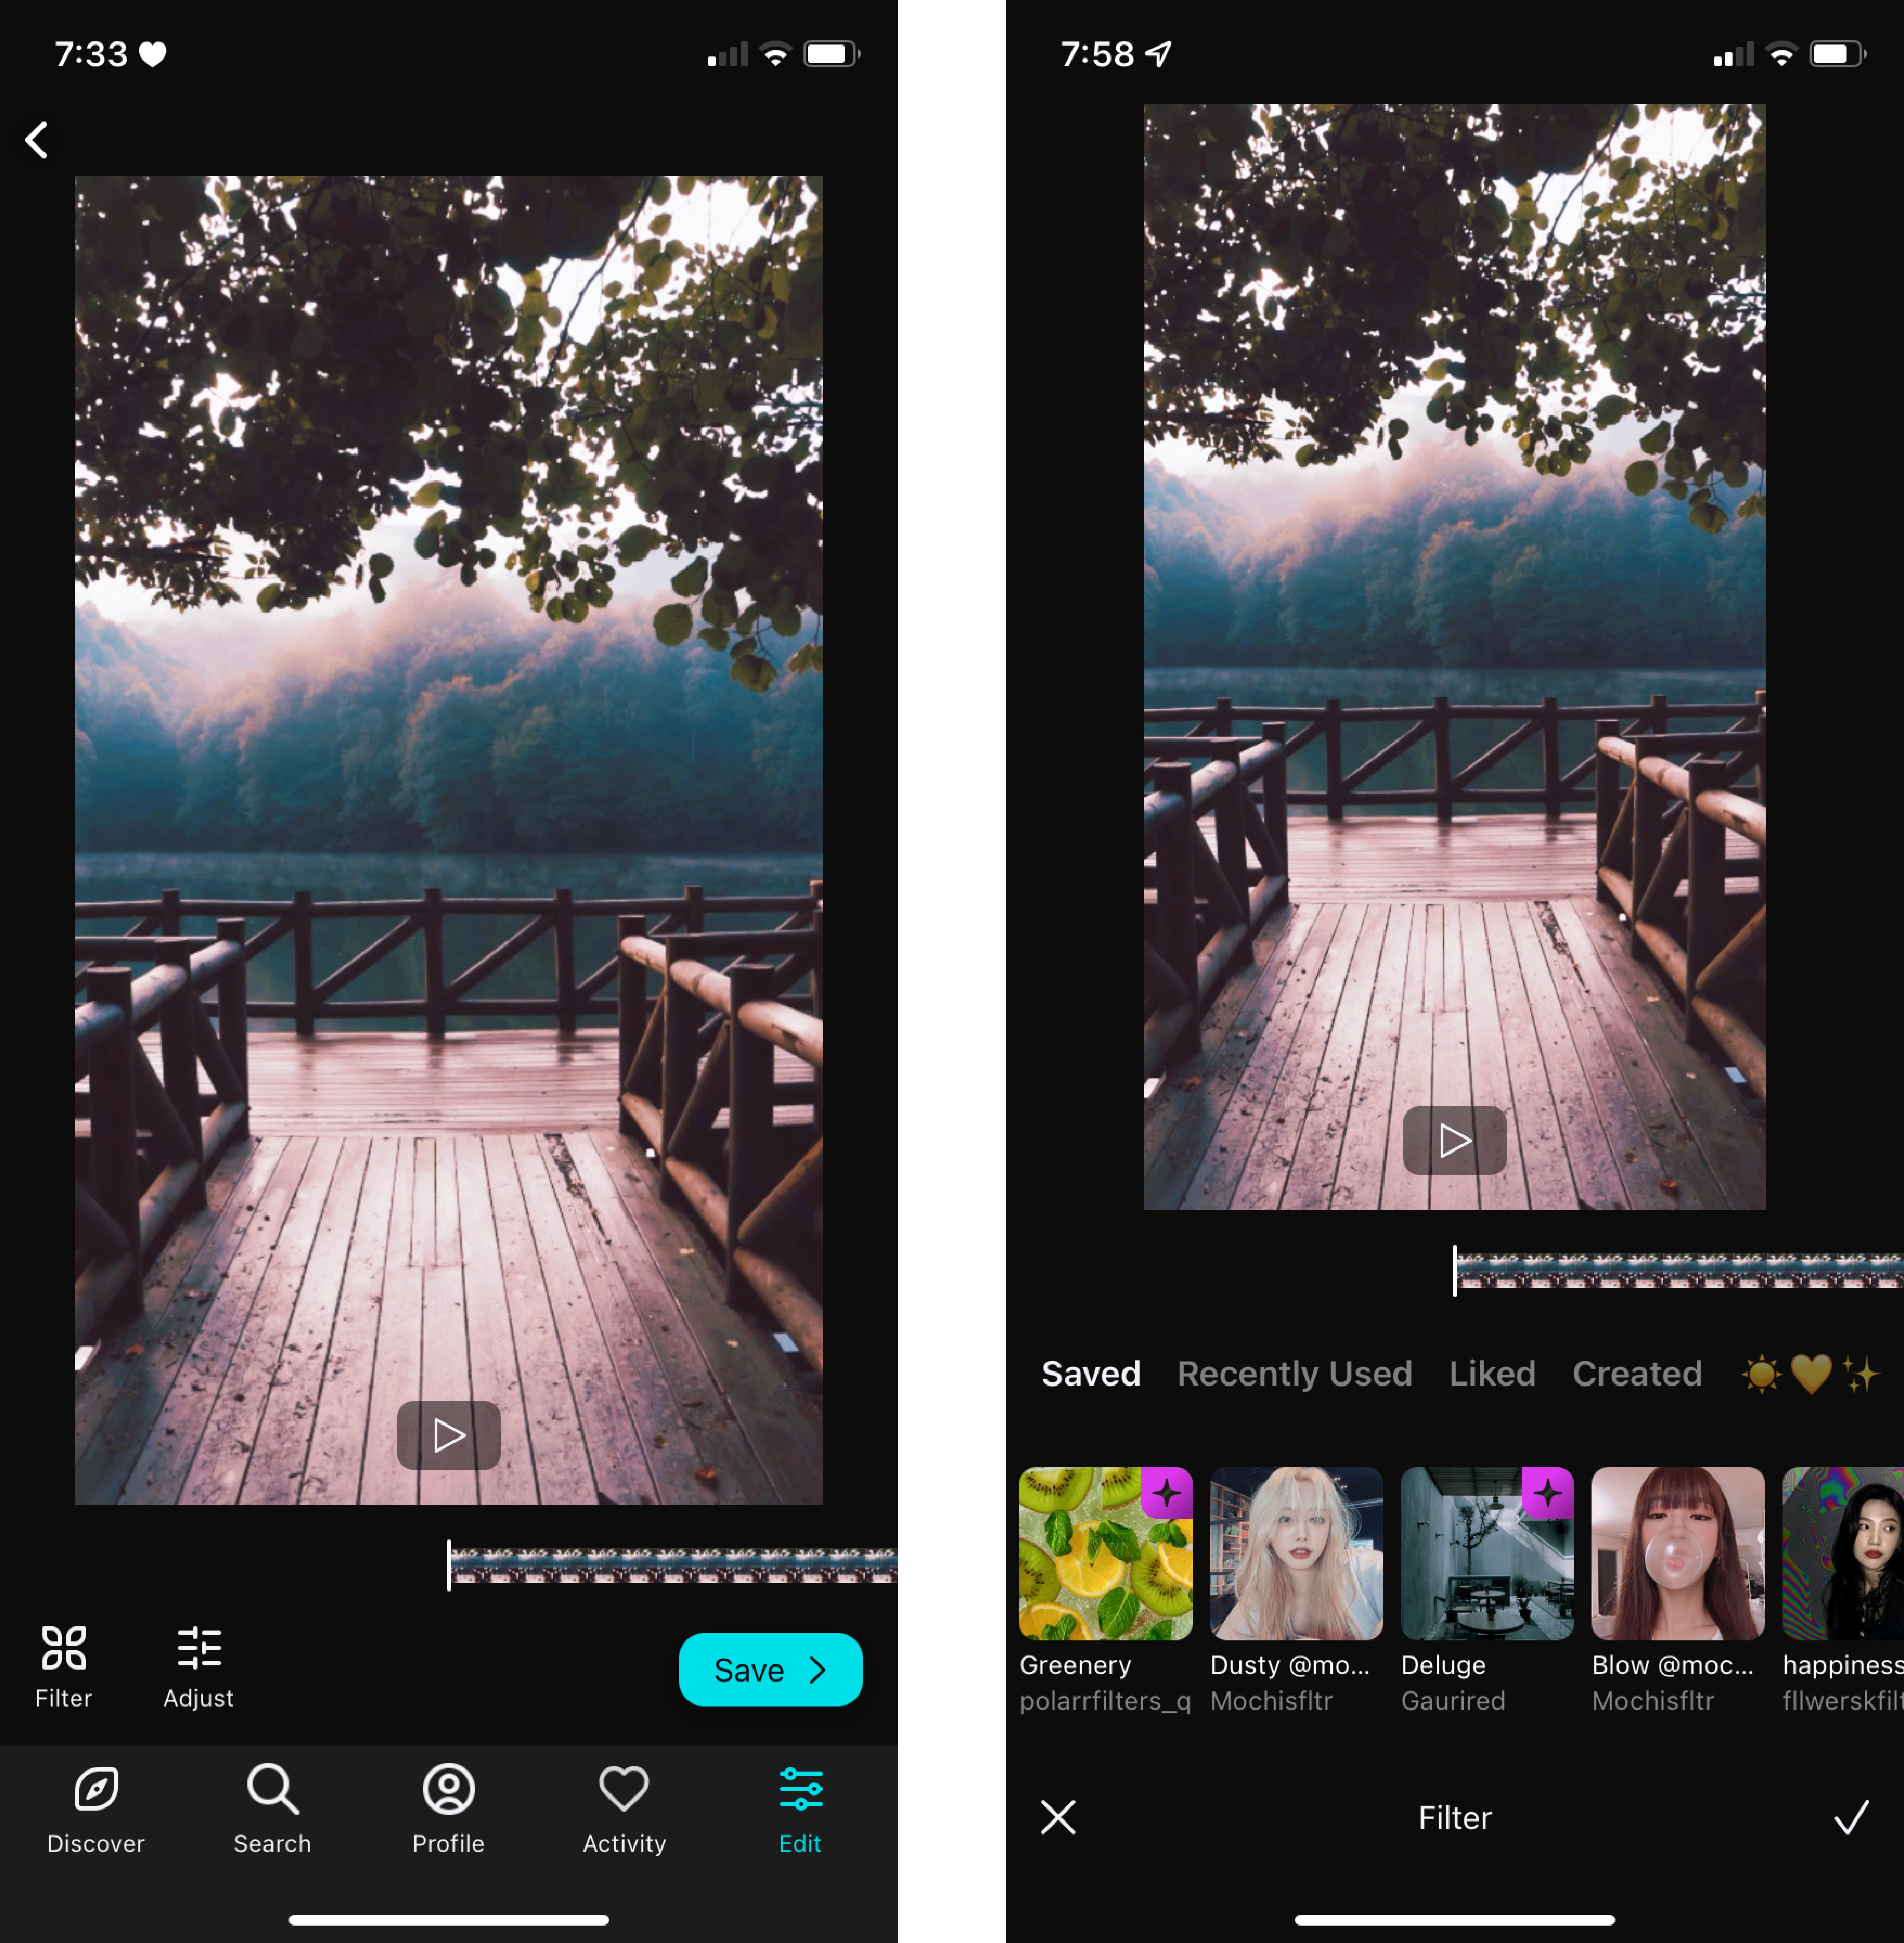
When starting an editing session in 24FPS, you will see the "Filter" and "Adjust" panels. Tap "Filter" to be lead to multiple filter options: "Saved", "Recently Used", "Liked", "Created", and any custom collections you may have made.
2. Import Filter
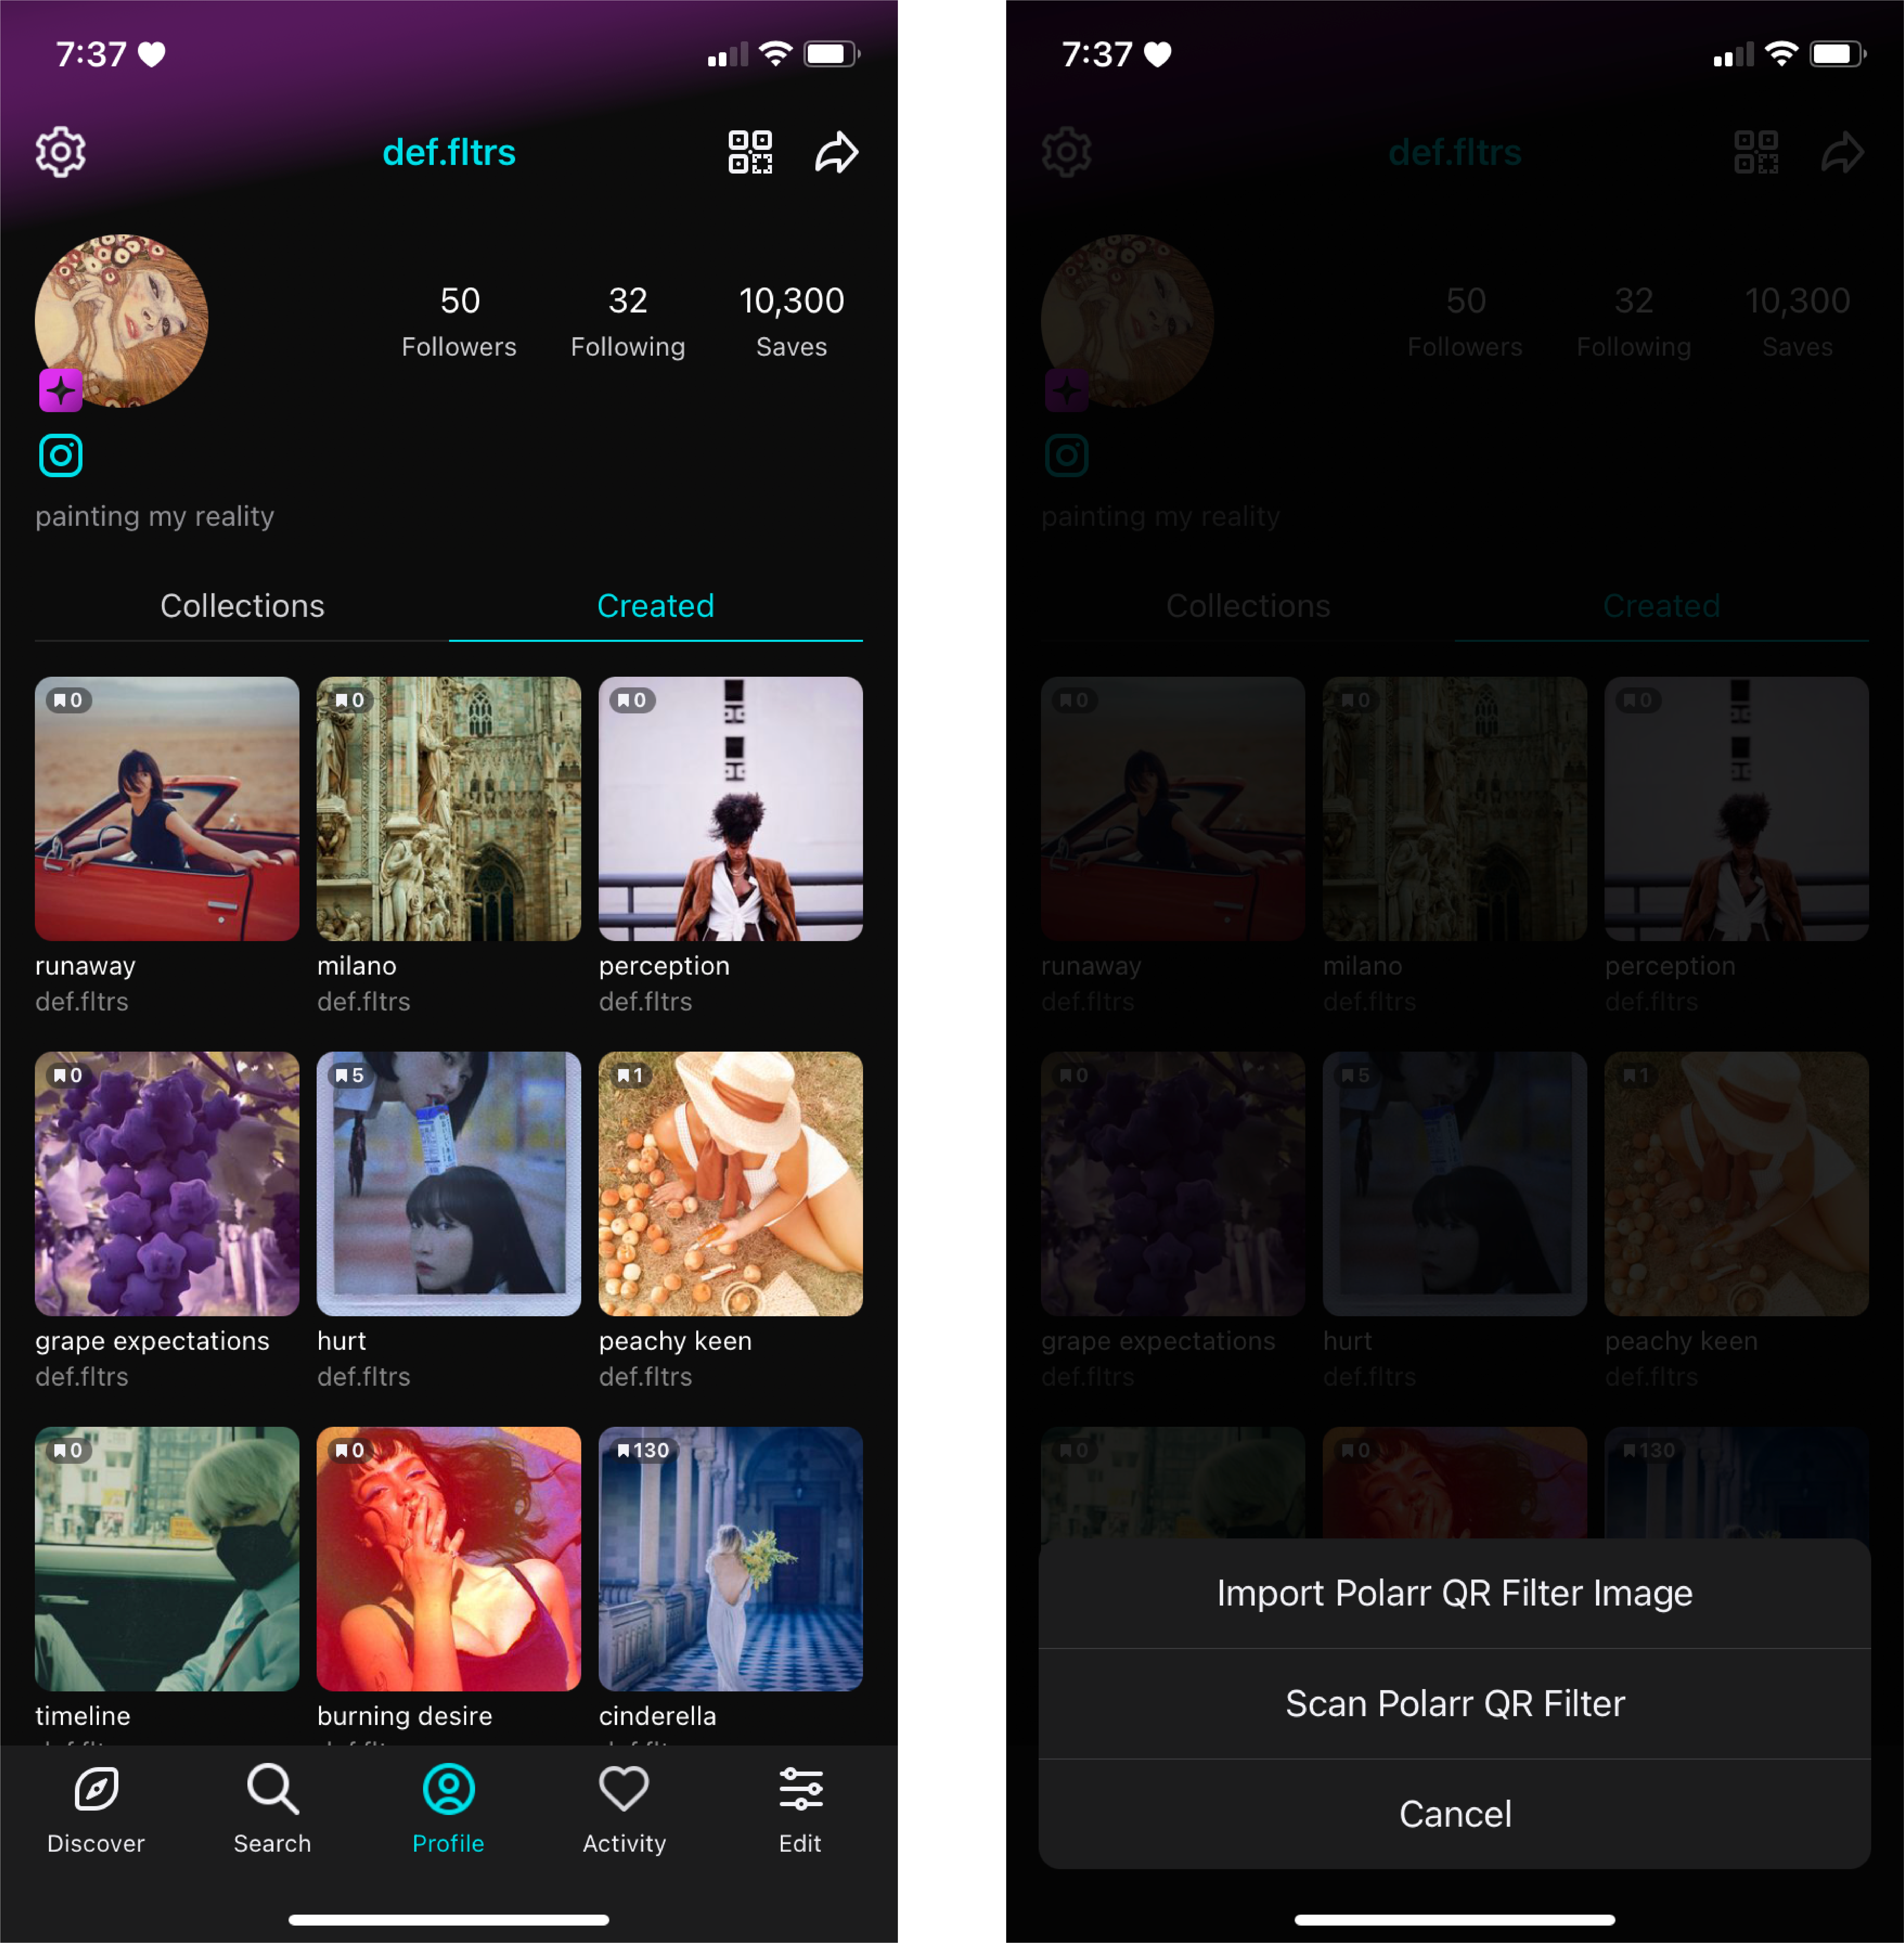
Under the "Profile" panel, you are able tap the "Import" icon. From here, you can import Polarr QR code images or scan them in.
3. Saving Filter
You can save the imported filter by tapping "Edit with filter" or by tapping the bookmark icon. After saving the imported filter, you can preview it on your video and adjust the filter intensity. Once saved, the imported filter will then show up under "Saved" in the "Filter" panel, ready to use again!